I hope this isn't so simplistic a post. There seems to be so much information, reviews, etc about homeschool plannners. I don't want to add to the confusion but I would like to share my planning/record keeping system. If you already have a wonderful, organised system that is working fine for you, please feel free to disregard this post. You have my permission ;) If you are feeling overwhelmed or simply don't know where to start, read on!
I have tried all sorts of things - free planner printable forms, free samples of homeschool planners, and "real" teacher planners. The problem was I was always modifying all these in some way and it was frustrating. I was also surprised that some planners have rules - never write in pencil, use this planner exactly as it's laid out, etc. I was ready to admit I was a complete planning failure. Then I got a bright idea. Instead of wasting printer ink printing out pages I wasn't satisfied with, I decided to design my own low-tech version. By looking at other planners I got an idea of what I wanted my planner to look like.
These were my final guidelines:
-one week's lesson plans per page
-lots of space to write
-a place to put extra notes for the week
-separate sections for each child and myself
-lines for writing on
I decided what I needed was a large divided notebook with 3 sections. Last July, I found Mead Five Star notebooks at a dollar store in Charlottetown for $3. They had enough pages to lesson plan for both children for the year plus an extra section for me to use for other purposes. The notebook was divided into 3 sections with pocketed dividers made of heavy cardstock, perfect for storing loose papers.
Once I got the notebook home and decided on how things would be laid out, I simply got out a ruler and pen and divided the pages (front side only) into 5 sections horizontally leaving a section at the bottom for other notes. I labelled these 5 sections Monday to Friday down the margin. I wrote the child's name and the week at the top of each page. Then I simply write in pencil the subjects/activities/assignments on the lines. I've developed a system for what order I write everything down in for a uniform look and to make it easier to find things.
I didn't sit down and draw up a full year's worth of pages at a time. Whenever I have a few minutes, I can fill out a few pages so I generally have them ready to go when I want to write down my lesson plans.
I hope this hasn't been too basic or boring for anybody but this is just another way I have found to stretch my homeschool budget. It may be labour intensive to some, but as I enjoy the planning process of our homeschool journey, making my own planner is a fun thing to do.
I have to say, I love the idea of some of those beautiful planners out there. I also love having exactly what I need. It's a pretty low-tech solution (notebook, pen, ruler) but it works for me!
Thanks for visiting today!
Showing posts with label frugal. Show all posts
Showing posts with label frugal. Show all posts
Monday, 8 April 2013

Friday, 24 February 2012
Homemade Laundry Soap, Version 2 . 0
Powdered homemade laundry soap - I can't believe I didn't try this before! I think the main thing holding me back was that the recipes I had come across for the powdered version required the use of a food processor (which I don't have and don't have any plans to purchase). Then I came upon this recipe at DIY Natural. It seemed too easy to not try, so why not?
I used the same basic ingredients as for my liquid version, minus the water:
1 bar Sunlight soap
1 cup Arm & Hammer washing soda
1 cup 20 Mule Team Borax
I grated the bar of Sunlight soap in a large bowl using a cheese grater. Then I added the washing soda and the borax.
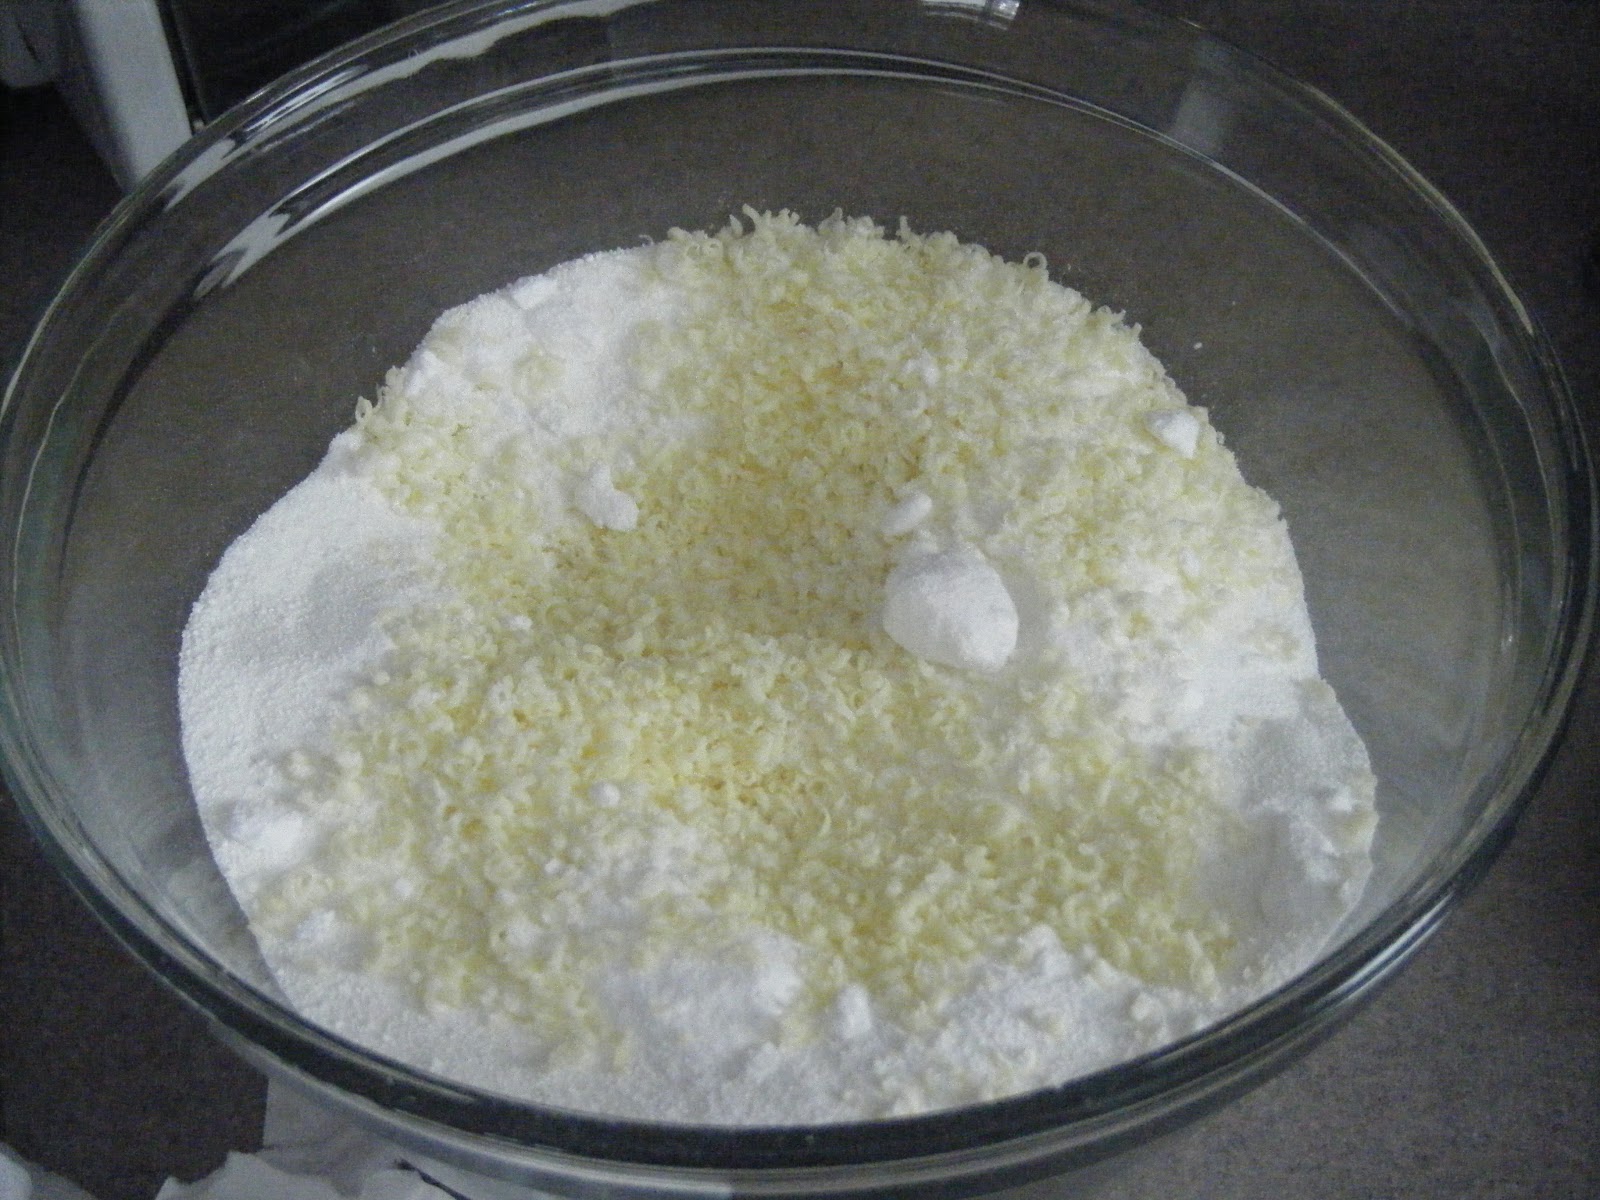
Then I stirred and stirred and stirred some more...

...until I ended up with a powder. It took about 10 minutes of vigorous mixing to end up with a fine powder. You use 1 or 2 tablespoons per load. This made enough to last me about two weeks.
I was skeptical about how well this would work and if it would leave a powdery residue on the laundry. So far, after nearly 3 weeks of use, I haven't had any problems at all. If a load is quite dirty (play clothes, etc.) I have been adding a scoop of Oxi-Clean to the water first.
Thanks for visiting today!
Thursday, 26 January 2012
Homemade Tortillas
In an effort to be frugal, I tried making my own tortillas. They were very easy to make, just a little time consuming. I used a recipe from Cooks.com (go here to get it!).


They came out a little thicker and more irregularly shaped than commercially prepared tortillas, but they tasted very good. This would be a good recipe to make in bulk someday when I have some extra time (haha).
Thanks for visiting today!

Yes, we like bananas (and they are $0.50/lb this week!)


They came out a little thicker and more irregularly shaped than commercially prepared tortillas, but they tasted very good. This would be a good recipe to make in bulk someday when I have some extra time (haha).
Thanks for visiting today!
Tuesday, 26 July 2011
Homemade Laundry Soap
A friend recently asked me for my recipe for homemade laundry detergent, so I thought I would share it with you. It's fairly easy but a little time consuming. It's very frugal - each batch costs only around $2 to make (works out to about 6 or 7 cents per load). Let's get started!
You will need:
a large container of some sort (I use a 3 gallon/11 litre bucket)
1 bar Sunlight soap*
1 cup Arm & Hammer washing soda*
1 cup 20 Mule Team Borax*
28 cups hot water
*these are all in the laundry aisle at my local grocery store


Grate (as finely as possible) your soap into a medium saucepan.

Add 6 cups hot water and heat on stove until the soap is dissolved. Remove the pan from heat and add 1 cup washing soda and 1 cup borax. Stir until everything is mixed together well. Pour the soap mixture in your container and add 22 cups of hot water. Stir well and let sit for up to 24 hours.
 This makes about 7 litres. After it has set, it will be a sort of gel. Stir it up and then you can transfer it to storage containers if you want. I usually dilute it more at this point so it's a little more pourable.
When you're using this for laundry, you'll probably use about a cup per large load. You need to let it mix with the water before you add whatever you're washing or you might get streaks of residue on your stuff. I usually wash in cold water but I don't think it would be as tricky to use in hot water (because it would dissolve more quickly in hot water).
And that's all there is to it! It doesn't have much scent so it's good for people who are sensitive to perfumes or have breathing problems. It just has a kind of clean smell.
Thanks for visiting today! I'm linking this post to the Hip Homeschool Hop.
I got the original idea for this recipe from a newspaper article, but I have tweaked and changed it..
You will need:
a large container of some sort (I use a 3 gallon/11 litre bucket)
1 bar Sunlight soap*
1 cup Arm & Hammer washing soda*
1 cup 20 Mule Team Borax*
28 cups hot water
*these are all in the laundry aisle at my local grocery store


Grate (as finely as possible) your soap into a medium saucepan.

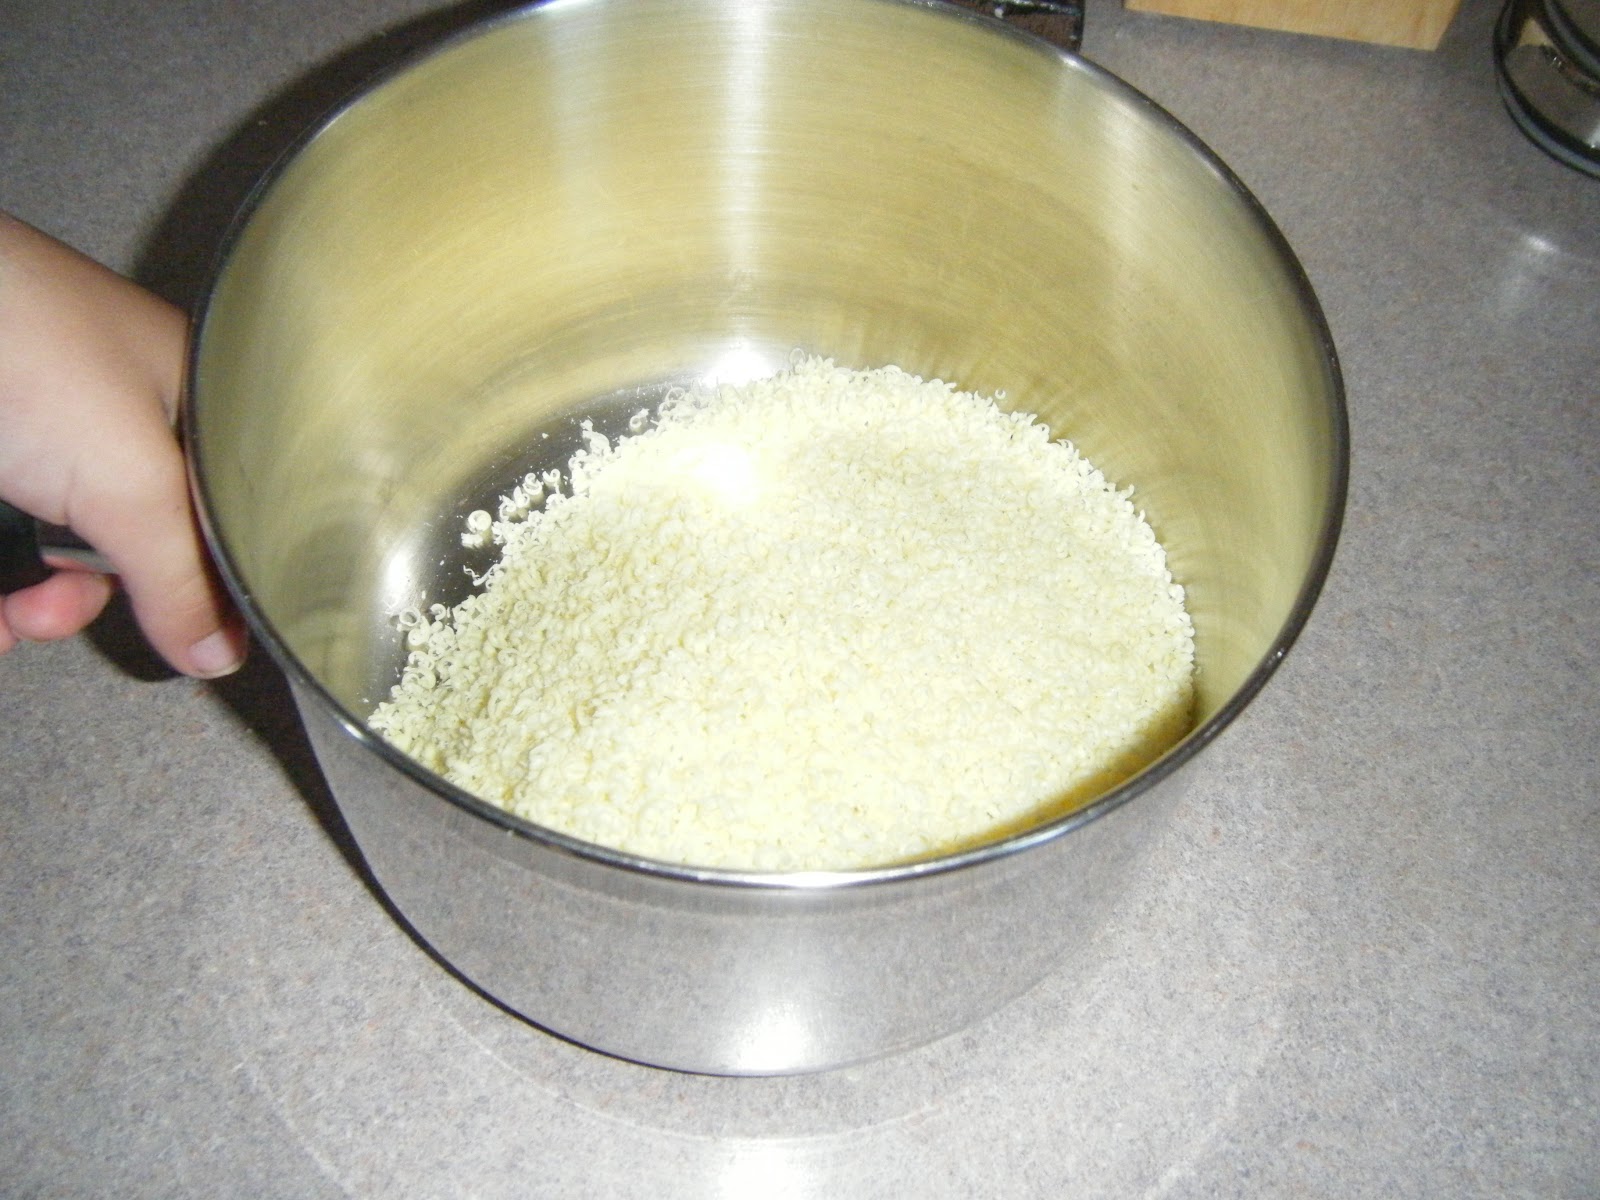
Add 6 cups hot water and heat on stove until the soap is dissolved. Remove the pan from heat and add 1 cup washing soda and 1 cup borax. Stir until everything is mixed together well. Pour the soap mixture in your container and add 22 cups of hot water. Stir well and let sit for up to 24 hours.

When you're using this for laundry, you'll probably use about a cup per large load. You need to let it mix with the water before you add whatever you're washing or you might get streaks of residue on your stuff. I usually wash in cold water but I don't think it would be as tricky to use in hot water (because it would dissolve more quickly in hot water).
And that's all there is to it! It doesn't have much scent so it's good for people who are sensitive to perfumes or have breathing problems. It just has a kind of clean smell.
Thanks for visiting today! I'm linking this post to the Hip Homeschool Hop.
I got the original idea for this recipe from a newspaper article, but I have tweaked and changed it..
Wednesday, 1 June 2011
Sheets to Swiffers
Another frugal household idea for you today. I recently saw how a woman had used an old chenille sock and some knit (t-shirt) scraps to make a washable, reusable Swiffer cloth. She was a sewing whiz and while I liked the idea, I can't sew (and I don't have a sewing machine). I have in the past just attached a rag to my Swiffer to use when I didn't have the proper cloths. While (trying) to declutter my house, I got an idea.
I don't know if "Brunswick Sheets" or "Health Sheets" are common in other areas, but they are quite popular here. They are basically polar fleece sheets and they are so incredibly comfortable! I have used them for about ten years and just love them. They can be quite pricey but the quality is excellent and they should last for many years. (By the way, these are my own opinions on these products and I have no connections with either company!)
Anyway, back to the Swiffer. My oldest set of fleece sheets (the first ones I got 10 years ago!), finally had the elastic go on them and I couldn't keep them on the bed. I hung on to them for a while and finally put one to use today.

First of all, I laid out the sheet on the table and cut the corner seams out so all the fabric would be flat and easier to work with.

Next, I put the Swiffer on the sheet to figure out approximately how big to cut the pieces.

You will want to have enough overhang of the fabric to tuck into the little grabby things (my very technical term!) on top of the Swiffer head.

Then you just cut your piece of fleece sheet to the needed size (notice how terribly even my piece is?). Use fabric shears for the best result and least amount of annoyance. ;)

With the fluffy side down, place your Swiffer on the top and attach the piece of fleece (using the little grippy things).

Tada - reusable Swiffer sweeper cloths! I didn't use the middle of my fitted sheet and I still got 6 cloths for the Swiffer. (By the way, I cut up the middle for "regular" rags. The outside edges were the fluffiest and I thought they would work better with the Swiffer.)
I'm sure you could use other worn out linens or articles of clothing (like towels, socks, or t-shirts), as long as the fabric has a bit of texture and absorbency. I'm planning on using my cloths both wet and dry and tossing them in the laundry when I'm finished with them. A really great ("green" and frugal) cleaner to keep mixed up in a spray bottle is 2 cups of water, 1/2 cup white vinegar, and about a tablespoon of dish soap. You can just squirt it on the floor and use your Swiffer with its reusable cloth for quick clean ups.
Excuse me, I have to go clean my floor now...Thanks for visiting today!
Sunday, 15 May 2011
Frugal Hand Soap
I wanted to share a frugal success story with you! I've had some "frugal dismal failures", so every success is very encouraging. I don't like using a lot of harsh chemicals in my house, so I've been making my own household cleaners or buying "greener" cleaners (when the price is right!). Over the last three years or so, I have successfully made my own laundry soap, glass cleaner, all purpose cleaner and scrubbing powder (like Comet). Today, I decided to tackle liquid hand soap!
I had previously looked for ideas online. There were recipes for making your own soap right from scratch, which didn't really appeal to me and would require some special equipment/ingredients. Then I found recipes that simply used bar soap as the base. That's what I decided to go with.
Any bar soap can be used (I think), as long as you like the smell of it. A lot of the recipes I found called for Ivory soap. I decided to use a glycerin soap for my first attempt. What I had on hand was a strawberry scented glycerin soap from The Body Shop (mine was in a heart shape). I forgot to take a photo before I started. By the way, I can't remember the last time I bought something at The Body Shop for myself. This soap was a gift! :)
The first step is to grate up your bar of soap. I used my cheese grater to do this.

Once the soap is all grated, measure is to find out how much you've got. I had about 2 cups of soap shavings. Next, I dumped the soap shavings into a pot and added 4 cups of hot water. Stir it a little and put it on to heat on the stove (using medium heat). Do not let it boil! Stir occasionally to make sure the shavings are melting.

When everything is melted, remove from heat and stir. Let the soap sit in the pot to cool a bit. After it has cooled down somewhat, you can transfer it to a bowl or container, but I just left it in the pot.

As it sits, it will get thicker. You can stir it every now and then while it's sitting to make sure it doesn't get lumpy. When it has cooled, it will form kind of a gel.

Stir it a bit and then pour some into your soap dispenser. I would recommend you only fill your dispenser half full, so if it is a little too thick, you can dilute it some more with water.
Here is the finished product:


This recipe made enough liquid soap to half fill my dispenser and fill a 907 g (2 lb) margarine container. So, I figure I can probably half fill my dispenser 10 times. That's quite a lot from one small bar of soap!
I know you could just as easily put your bar of soap in a soap dish and use it like that, but I kind of prefer liquid hand soap for communal use :) Also, my kids tend to make a mess with the bars of soap (leaving it floating in water, squeezing it when it's wet, etc). Next time I make this, I'd like to try Ivory soap to see if it gives the same results.
I hope you've enjoyed my post today. Thanks for visiting!
Tuesday, 3 May 2011
"Free" Projects - Part 1
So, now that April is over, I'm going to show you a couple of projects I made using items from my crafting stash!

This is an old leather Bible case I had - pretty worn looking. I was thinking of cutting it up and keeping the best pieces for some sort of craft project. While I was mulling this over, my husband happened to remark he wanted some sort of container for his collection of tin whistles. The light bulb came on over my head and I started thinking of how we could transform this into what he had in mind.

This is what the inside looked like before we started working.
The first thing I did was freshen it up a bit and change the colour slightly. The leather was kind of dry looking in spots and it was burgundy. I wanted it to look a little more masculine. So, I turned to shoe polish.

This is what my husband uses on his brown dress shoes. I simply applied it to the case the same way you would use it on a pair of shoes. This is what I came up with after it had dried.
It's a little hard to see from the photos but the leather turned a nice rich brown. The shoe polish also covered up the worn spots. On to the next step...

After hemming and hawing for several minutes about what to use to hold the whistles in, we decided on some wide elastic I had (I think it may have come out of an old pair of pajamas). This is where my husband took over as I couldn't force a needle and thread through the leather. He sewed the elastic to the edges of the case and then we added some adhesive backed velcro to create some "loops" for the whistles to slide into.

The finished product! Cost - $0. Time start to finish - about an hour. Below is a a "real" whistle carry bag. It costs $24.95 plus shipping and handling. Our version might not be fancy but it works!

Thanks for visiting today!

This is an old leather Bible case I had - pretty worn looking. I was thinking of cutting it up and keeping the best pieces for some sort of craft project. While I was mulling this over, my husband happened to remark he wanted some sort of container for his collection of tin whistles. The light bulb came on over my head and I started thinking of how we could transform this into what he had in mind.

This is what the inside looked like before we started working.
The first thing I did was freshen it up a bit and change the colour slightly. The leather was kind of dry looking in spots and it was burgundy. I wanted it to look a little more masculine. So, I turned to shoe polish.

This is what my husband uses on his brown dress shoes. I simply applied it to the case the same way you would use it on a pair of shoes. This is what I came up with after it had dried.


It's a little hard to see from the photos but the leather turned a nice rich brown. The shoe polish also covered up the worn spots. On to the next step...

After hemming and hawing for several minutes about what to use to hold the whistles in, we decided on some wide elastic I had (I think it may have come out of an old pair of pajamas). This is where my husband took over as I couldn't force a needle and thread through the leather. He sewed the elastic to the edges of the case and then we added some adhesive backed velcro to create some "loops" for the whistles to slide into.

The finished product! Cost - $0. Time start to finish - about an hour. Below is a a "real" whistle carry bag. It costs $24.95 plus shipping and handling. Our version might not be fancy but it works!

Thanks for visiting today!
Subscribe to:
Posts (Atom)